Voile TTS Transit Binding FAQ
Share this Post
Now that the TTS Transit Telemark binding has been on the scene for a full season, we thought it was the perfect time to compile some frequently asked questions and provide some answers! But before we dive into the FAQs, let’s take a moment to break down what makes this binding special. Without further ado, here’s a closer look at the TTS Transit binding.
TTS Transit Specs
First, let’s talk weight. The TTS Transit Binding comes in at an impressive 1.1 kg per pair (that’s under 2.5 lbs), making it lighter than its predecessor. Here’s the kicker: the heel assembly is removable for ascents, saving an additional 528g per pair (roughly half the binding’s total weight). Simply stow the heel assembly in your pack, and you’re all set for the ascent. If you’d like to know all of the TTS Transit specs, please see the table below.

Toe Piece
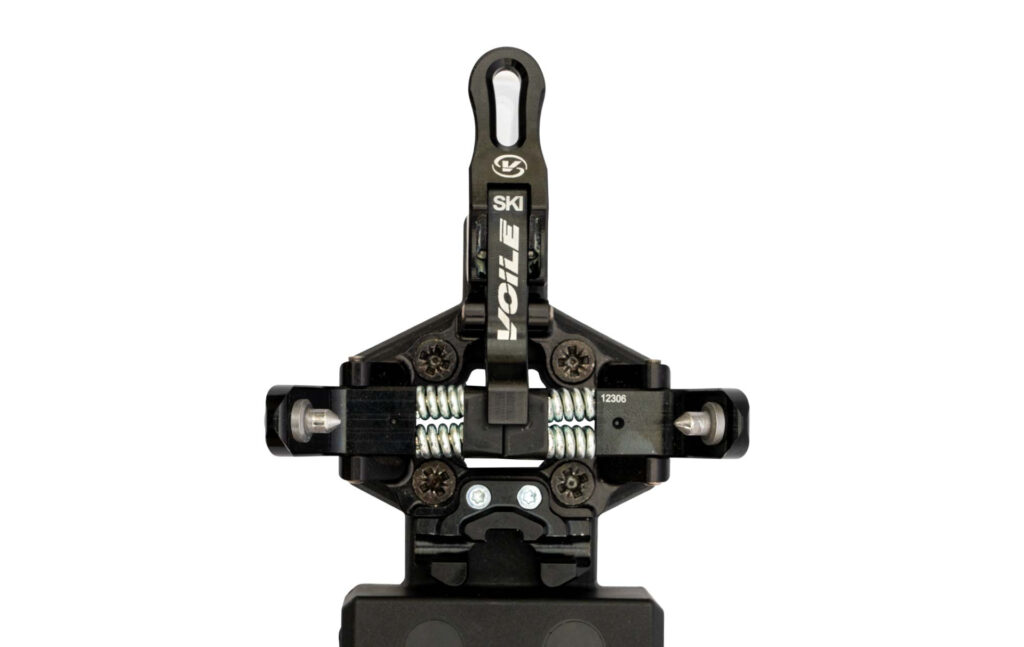
One of the standout upgrades in the TTS Transit is the addition of an AT-style toe piece from our friends at Plum. This means easier alignment with your boot’s pin inserts and significantly less fiddling to step in.
As shown in the photo below, this toe piece also features a detachable crampon claw—a game-changer for navigating tricky conditions.
Toe Assembly
The updated toe assembly ties everything together. It serves as the platform for your boot and securely connects the heel assembly. What makes this version unique is its adjustable activity settings, which allow you to fine-tune the binding’s feel to match your skiing style. You can see this in figure 2 below.
Activity Positions and Locking Mechanism
The TTS Transit offers three activity positions, letting you customize the binding’s performance:
- The position closest to the toe piece is the most neutral, reminiscent of a classic 75mm binding.
- The furthest back offers an active feel, providing a springy feel similar to a high-energy NTN binding.
- The middle position offers a blend of the two.
Not sure which is right for you? No worries! You can easily adjust the heel assembly between positions to find the sweet spot.
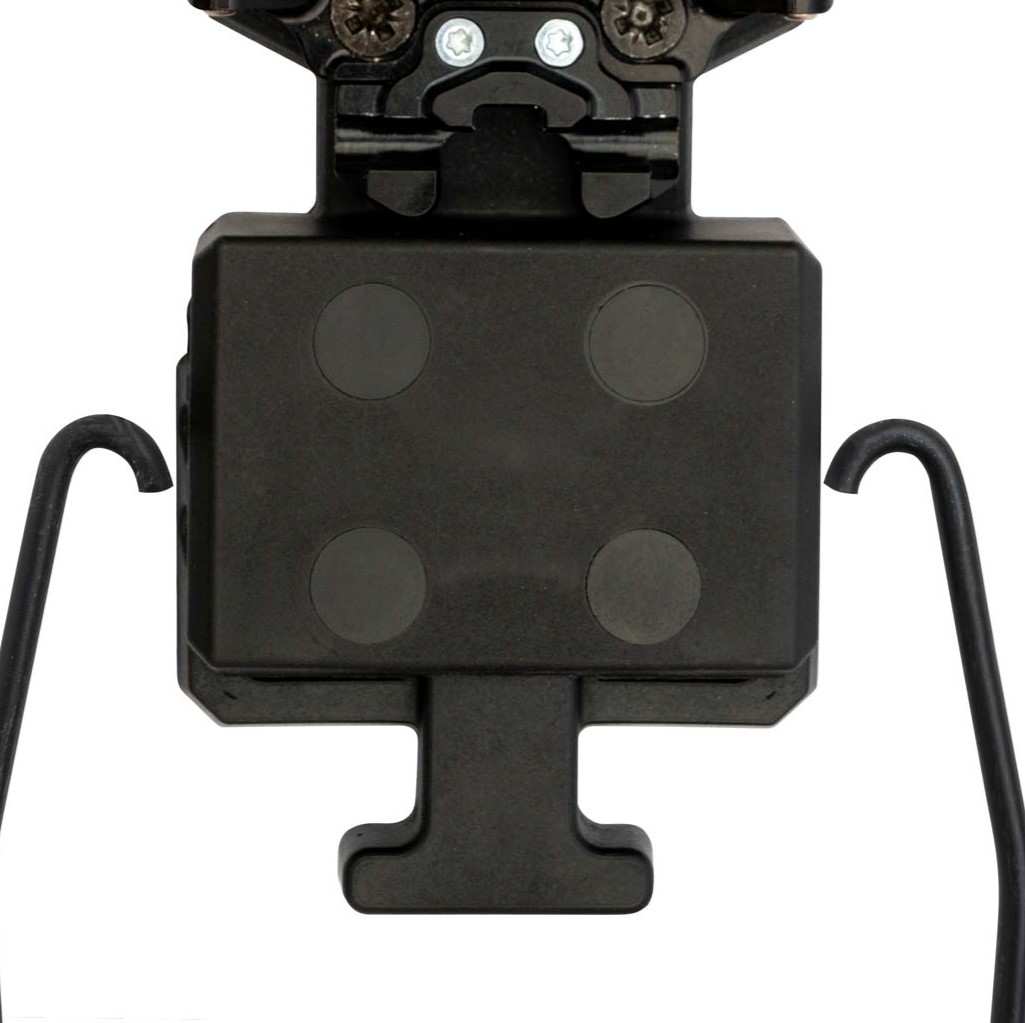
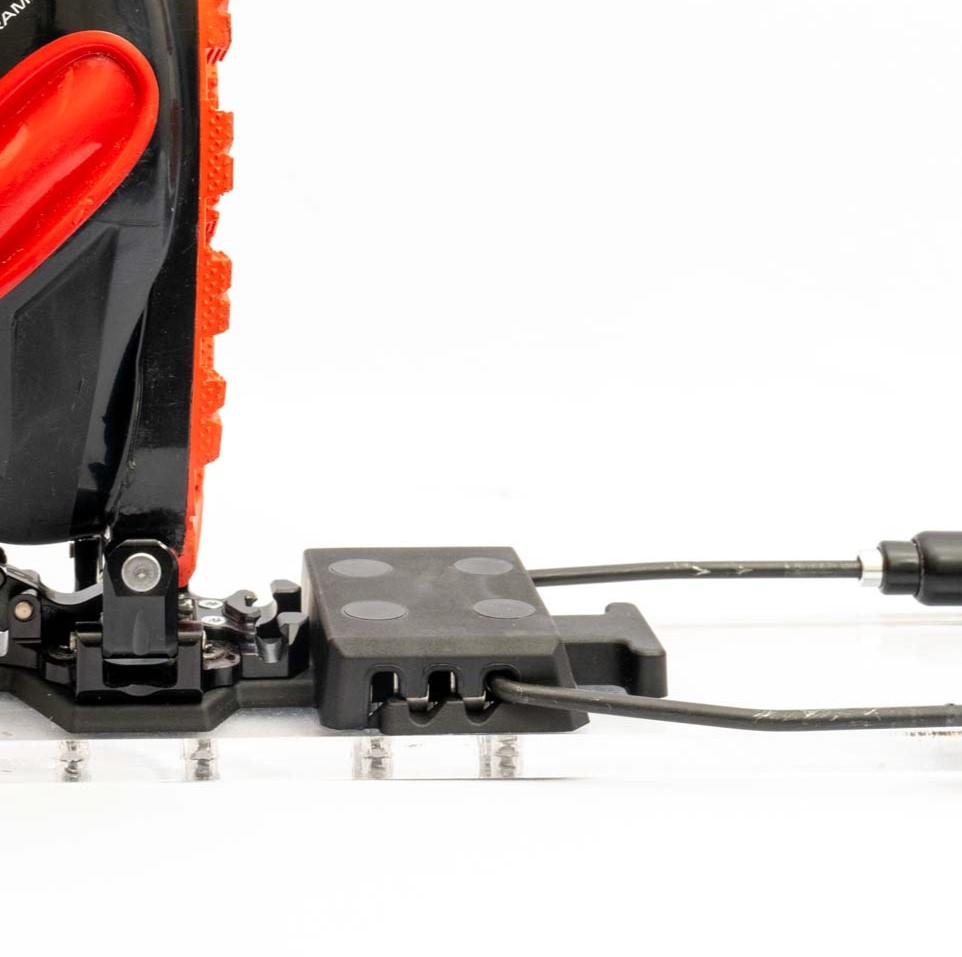
To make this system intuitive and reliable, we’ve added a locking mechanism to the toe assembly. This ensures the heel assembly is securely attached when in use—and it’s effortless to remove when needed.
Here’s how to change the wire position and use the lock mechanism:
- Pull the lock mechanism heelward toward the release position.
- Rotate the cartridge assembly forward toward the toe piece until the wires are vertical (See image below).
- Spread the wires away from each other, gently wiggling them until both sides come free from the riser. Tip: This is easier to accomplish by keeping subtle pressure between the wire’s hooks and the ski’s topsheet.
- Reinsert the wires in your desired activity position.
- Pull the heel assembly “up” while pushing the locking mechanism forward into the lock position.
- Adjust the cartridge barrels accordingly.
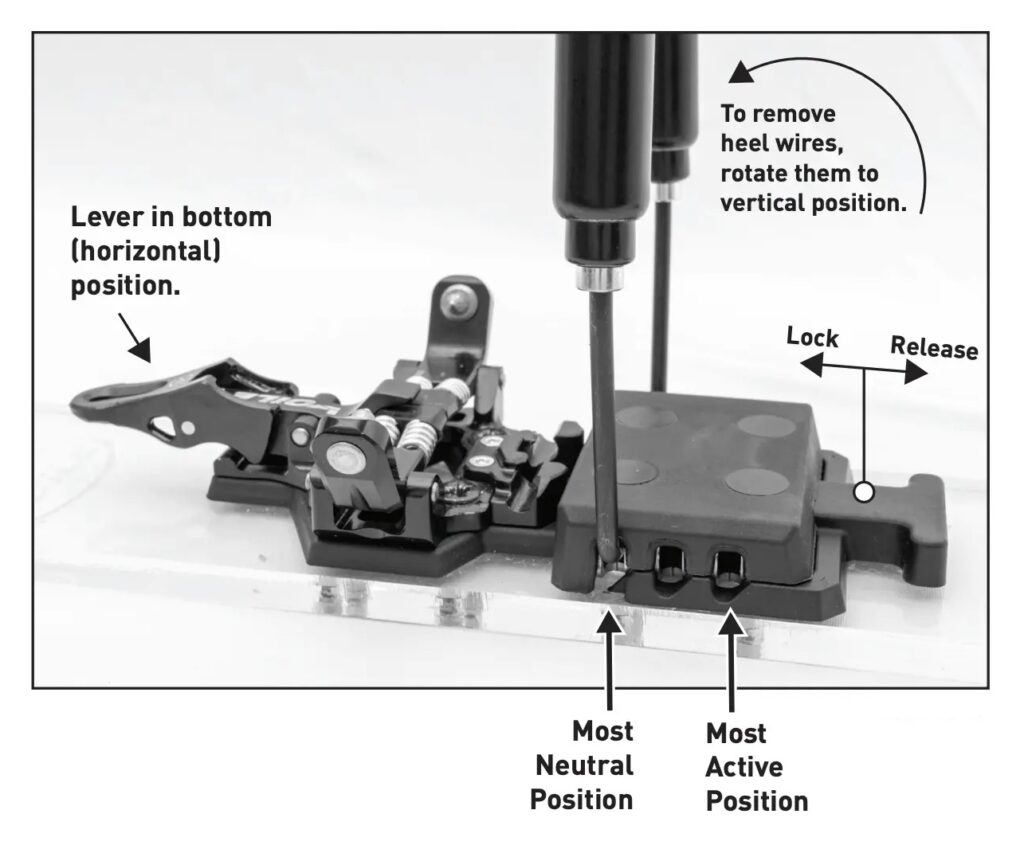
This is just the tip of the iceberg. Check out the FAQ section below for answers to your burning questions about the TTS Transit Binding!
TTS Transit Binding FAQ
We sourced questions from all around the internet and once again, got answers with the help of our Production Manager, Mark Christopherson.
Q: What is the difference between this (TTS Transit) and the other grey version (Original TTS)?
A: For a full breakdown of the new features, scroll back up—but here’s the short version:
- The Transit features an AT-style toe piece from Plum, which includes a detachable crampon claw for added versatility in tricky conditions.
- The toe assembly has been completely revamped, allowing you to switch between three activity positions to customize the binding’s feel.
- For the ascent, the heel assembly is removable, saving nearly half the binding’s weight during climbs.
- Lastly, the Transit introduces a locking mechanism in the toe assembly, ensuring your heel assembly stays securely attached when needed.
The TTS Transit takes the solid foundation of the original TTS and elevates it with thoughtful design upgrades for both performance and ease of use.
Q: Love it but how about the Release in case of an avalanche?
A: We don’t have any hard data for this one but, with the Plum toe piece, you could expect the toe to release like other Plum AT toe pieces. This binding features a 75mm style heel assembly. We make no claims of releasability.
Q: Boot recommendations?
A: Our top pick is the Scarpa TX Pro. As the lightest telemark boot on the market and boasting an excellent walk mode, it’s a natural pairing with the TTS Transit. If the TX Pro doesn’t quite fit your foot, consider the Crispi Shiver. It’s Crispi’s most touring-oriented telemark boot and performs well on the uphill, as confirmed by the Voilé team members who’ve spent time using it.
For other options, you might explore the used market for rare finds like the Scarpa Terminator X-Pro or the old Scarpa F1 Telemark boot. At the very least, you’ll need a pin-capable telemark boot with a solid walk mode that suits your foot shape and comfort.
Q: Does this binding come with the crampon included?
A: The crampon claw is included in the box, but the crampon itself can be purchased separately here.
Q: What makes the front neutral and the rear active?
A: The further back you move the pivot on telemark bindings, the more active the binding feels. You have more resistance when lifting your heel off the ski. Since we have three positions, we call the forward one more neutral and the rear position more active. However, keep in mind that because of the under-foot routing, the binding feels more active than traditional bindings where the cartridges are to the outside of the boot. We suggest starting in the middle position out of the box and going from there.
Q: Is this as laterally stiff as an NTN binding?
A: With the Stiff springs, we would say yes. With the soft springs, perhaps a bit less torsion than say the Outlaw.
Q: Where do I put the springs when I climb up (touring mode)?
A: One of the benefits of this binding is the ability to store the heel assembly in your pack while touring. However, if you choose not to store the heel assembly in your pack, you can lock off the heel assembly underneath the back lip of the heel pad and the 55mm wire will be resting on top of it. You’ll have access to both the 55 and 75mm climbing wires. When you get to the top of the climb, you can put the heel lever on the boot, rip skins, tighten boots, and ski.
Still have questions? Feel free to leave them in the comment section below, send an email to info@voile.com, or give us a call at 801-973-8622. We’re around M-F 9-5 MST and happy to help!
WARNING: THE VOILE TTS TRANSIT IS NOT A SAFETY BINDING AND HAS NO RELEASE MECHANISM Backcountry /Telemark skiing is an inherently dangerous sport in which there is always the possibility of bodily injury and death. VOILE TTS bindings are not safety bindings and therefore do not decrease the inherent risk of injury associated with the sport of backcountry skiing. The user of this product is solely responsible for learning proper skiing techniques, avalanche awareness, and exercising good judgment. The manufacturer, distributor, wholesaler, and retailer are not liable for any personal injuries sustained by the use or misuse of this product.
Share this Post


